Model building
F-14 Tomcat
www.e-rokodelnica.si
Model building | F-14 Tomcat | www.e-rokodelnica.si |
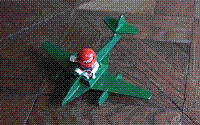
Here is a plan for a model of aeroplane F-14, which is made of plywood. The model is designed to learn sawing with a fretsaw and other skills. Since it is not difficult to make, it is suitable for beginners. The model aeroplane is not a flying one, but it can be used as a toy. Because of small parts, it (as a toy) is not suitable for children under three years.
| 
| 
|
It is not allowed to use this document or part of it for commercial purposes. The exception is teachers who may use it at their own classes.
We cut parts of the aeroplane out of 4 mm thick plywood first. We find patterns of the parts in files that are pointed at by a link on figure 1. Each part is to be cut once. Parts, which take part in the assembly twice like vertical stabilizers 8 are also drawn twice in the drawings. We print each drawing and transfer the patterns to the plywood. A procedure is described in greater detail in the page Transferring Shapes of Parts to Plywood. The part 1 is too big to be printed as one piece. Therefore, we join both pieces at the dashed lines while we transfer this part onto the wood.
   |
   |
Figure 1: Parts of the aeroplane
We cut all parts out of plywood as precisely as possible. We can find some tips to help us sawing in the page Using of a Fretsaw. Joints of parts and a contact side of wings must be cut precisely to make assembling easier.
We drill holes in the pieces. An M4 screw is inserted through a hole with a diameter of 4.5mm. While, a wire is inserted through a hole with a diameter of 2mm. According to screws or wire, we should choose other diameters of drill bits.
The lower edge of the two seats 5 is sanded at an angle.
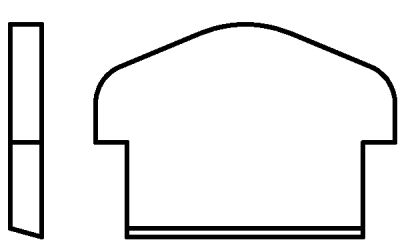
Figure 2: Sanding of bottom edge of the seat 5
A suitable spring can be found in a ballpoint pen. Its outer diameter should not exceed 4 mm, that is the thickness of the plywood. As we can see in the Figure 2, the spring holds the wings of the aircraft in both extreme positions. Depending on the position of the wings, the spring is compressed between 8mm and 15mm. If the dimensions of the spring we have do not match, we need to fix its space in the wings.

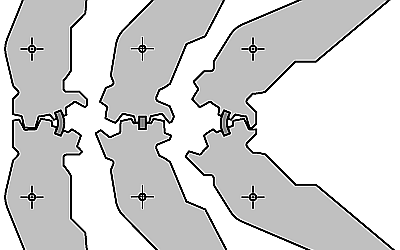
Figure 2: Spring
After that, we sand the parts to remove cutting marks.
First, we glue the cockpit.

Figure 3: Assembly of the fuselage, step 1
We glue the tails 8 to the motor outer housings 7.

Figure 4: Assembly of the fuselage, step 2
An inside motor housing is assembled next. Into the fork joint 9, 10, 11, a trigger 18, 19 is going to be attached. Therefore, a step must be made in parts 9, 10 as we seen in figure 5.


Figure 5: Assembly of the fuselage, step 3
We build both jet-engines.


Figure 6: Assembly of the fuselage, step 4
We glue the upper part of the hull 15 the way that the gap is wide enough so that the wings 16, 17 can move without jamming.


Figure 7: Assembly of the fuselage, step 5
The fuselage is assembled and we could paint it. At the same time, we paint the wings 16, 17 and the triggers 18, 19.
Figure 8 shows the movement of the wings and the position of the spring holding the wings in the extreme positions. To see the mechanism, the fuselage is drawn without the upper part 15.


Figure 8: Wings
Finally, we fasten the wings with screws and self-locking nuts. The nuts should not be tighten too much. Namely, the wings should move. We should use a lock nut, which does not get untighten.

Figure 10: Wings attachment
A trigger 18, 19 is attached into the fork (Figure 5) with piece of wire. As we can see in the Figure 10, our F14 is armed with two kitchen rubber bands.


Figure 9: Trigger

Figure 10: Ammunition
The aircraft was built by Grumman for the U.S. Navy in the mid-1970s. The navy was using it until the end of the millennium. Tomcat became famous as the lead actor of the movie Top Gun. Tom Cruise thinks he's the star, but ...
The aeroplane is 19m long. It’s just as wide across the open wings. The plane is quite large. Its maximum speed is more than twice the speed of sound.